TLDR: For party directional signs printable at home, use one destination and one obvious arrow per sign. Start with letter-size sheets for doors and walls, half sheets for tables or short hallways, and larger professionally printed pieces only where guests must see the message from farther away. Use strong contrast, test the arrow direction at the venue, and place signs where a guest has to make a decision—not after the turn.
The best party directional signs printable for a real event are not necessarily the most decorative. They are the signs a guest can understand in a second while walking, carrying a gift, or looking for the restroom. A bold arrow, two or three words, and consistent colors will usually work better than an elaborate illustration surrounding tiny text.
Begin with left-arrow and right-arrow versions of every necessary destination. Add a straight-ahead arrow for long paths and a double arrow only when the wording clearly assigns a destination to each direction. Before printing the full set, walk from the parking area to the party as though you have never visited the venue.
Plan printable party directional signs around decision points
A sign belongs wherever a guest must choose between two or more routes. Typical locations include the driveway entrance, parking area, front walk, building lobby, hallway junction, stair landing, backyard gate, and the point where the food and activities separate.
Avoid putting up a sign merely because there is an empty wall. Instead, stand at each entrance and ask, “What would I need to know next?” If the correct route is already obvious, skip the sign. If guests could reasonably turn the wrong way, add one.
Short wording is easier to scan than a complete sentence. Useful sign labels include:
- Entrance or Welcome
- Check In
- Party This Way
- Food
- Drinks
- Desserts
- Restrooms
- Photo Booth
- Games
- Gifts
- Parking
- Exit or Thank You
Use the same term throughout the event. Switching between “Restroom,” “Bathroom,” and “Facilities” creates unnecessary inconsistency. For a children’s party, familiar terms such as “Games” and “Treats” may be clearer than theme-heavy wording that adults must explain.
Choose a sign size for the viewing distance
There is no universal best party-sign size. The right format depends on how far away guests will be, how quickly they are moving, and whether the sign sits on a table, hangs on a door, or marks an outdoor turn. These dimensions are flexible planning defaults rather than visibility standards.
| Format | Planning size | Useful placement | Design priority |
|---|---|---|---|
| Full letter sheet | 8.5 × 11 inches | Doors, walls, hallway turns and indoor entrances | Large arrow and a short destination |
| Half letter sheet | 5.5 × 8.5 inches | Buffet tables, check-in stations and short corridors | Compact wording with generous margins |
| Quarter letter card | 4.25 × 5.5 inches | Place-card holders and close-range tabletop directions | One or two words with a simple arrow |
| Larger display | Sized for the stand, frame or professional print product | Parking entrances, lawns and large rooms | Long-distance contrast and minimal detail |
Letter-size sheets are convenient because they fit an ordinary home-print workflow. Avery also provides an official template for an 8.5 × 11-inch card, demonstrating that full-sheet letter-size cardstock is an established printable format. View the Avery letter-size card template.
If one letter-size design will be cut into two half sheets, make the canvas 8.5 × 11 inches and divide it evenly. Keep each sign self-contained so a cutting error does not remove part of an arrow. Four quarter-sheet cards can likewise be arranged on one letter sheet, although printer margins may require extra white space around the outer cards.
Make every arrow easy to follow
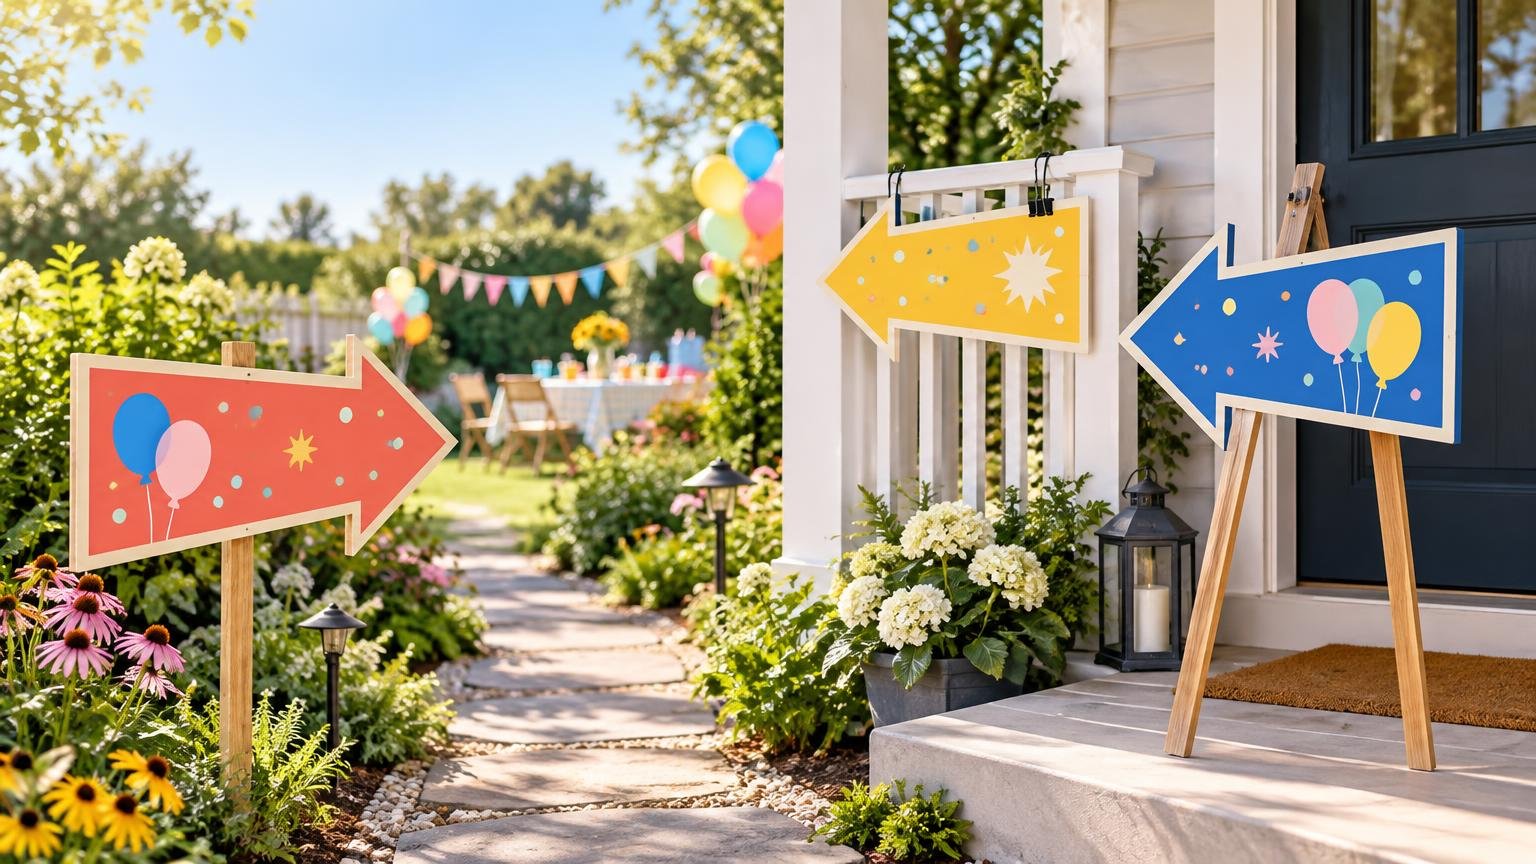
Give the arrow visual priority. It should not be mistaken for a decorative chevron, border, or background pattern. A practical layout uses the destination as the largest text and a thick arrow beneath or beside it. Leave open space around both elements.
High contrast matters more than matching every subtle color in the invitation. Black on white, deep navy on pale yellow, or white on a dark purple field will be easier to scan than orange text over a busy pumpkin pattern. Theme illustrations can sit in a corner or form a restrained border without competing with the instruction.
Follow these consistency rules across the set:
- Use one destination per sign whenever possible.
- Keep the destination wording to roughly one to three words.
- Use the same arrow shape, typeface and color system throughout.
- Reserve one strong color for arrows so guests learn what to follow.
- Do not rotate text to match a diagonal arrow.
- Check every arrow at the venue before securing the sign.
- Repeat a sign after a long route or wherever reassurance is useful.
A double-arrow sign can work at a true split—for example, “Food ← | Games →”—but separate signs are often clearer. Never use a double-headed arrow with only one destination; it tells guests that either direction works even when that may not be true.
How to print party signs at home
Create one test page before printing a complete set. The test should include the largest text, the smallest text, the darkest color block, and an arrow close to—but not touching—the intended margin. Print at 100% or “actual size” when physical dimensions matter. A “fit to page” setting can shrink the design and alter its margins.
Many home printers cannot print to every edge of a sheet. If the printer offers borderless printing for the selected paper size and media type, test it rather than assuming it will work with heavy cardstock. Another route is to print the design on a larger supported sheet and trim it to the finished size for an edge-to-edge appearance.
For an intentionally home-printed look, a white margin is not a flaw. Build it into the design as a clean frame. This approach uses less ink, reduces trimming, and avoids depending on borderless capability. Check the printer manual for supported paper weights and feed paths before buying a full package of cardstock.
Paper selection should follow the display method. Ordinary copy paper can work inside a rigid frame or clear sleeve. Cardstock is more suitable when the sign must stand in a holder or remain flat without full support. If you want more guidance on how paper behavior affects home-print projects, see this guide to choosing paper for printables.
Set up bleed and safe space for professional printing
Bleed is artwork that extends beyond the final trim line. It prevents an unintended white sliver from appearing if trimming shifts slightly. A commonly used professional setup adds 0.125 inch of bleed on every edge. Under that convention, an 8.5 × 11-inch finished sign requires an 8.75 × 11.25-inch artwork file.
Bleed is not the same as safe space. Background colors and images should extend through the bleed area, while essential wording and arrows should remain comfortably inside the trim line. Ask the selected printer for its current template because its required bleed, safe area, accepted file format, and product dimensions may differ.
If matching signs will be professionally produced with invitations or cards, custom party stationery printing can provide a route from uploaded artwork or a template to a coordinated printed set. Keep signs, invitations, and labels visually connected with the same two or three colors and headline typeface rather than forcing every piece into an identical layout.
Choose paper or a protected outdoor setup
For indoor use, paper in a frame or cardstock in a sign holder is usually the simplest arrangement. Outdoors, the setup must account for moisture, wind, sunlight, ground conditions, and how long the signs will remain in place. A clear sleeve can protect a temporary paper sign from light splashes, but an open edge can still admit water.
For a short outdoor route, place printed sheets in closed frames or suitable protective holders and attach them to stable stakes or stands. Weight freestanding displays where appropriate and keep them out of walkways. Do not describe an entire sign as waterproof merely because one component is water resistant; seams, cut edges, backing, ink, and attachment points all affect durability.
A custom vinyl sticker or label may be useful when the directional graphic needs to attach to a dedicated event board, bin, or reusable prop. CustomStickers describes its products as vinyl stickers with waterproof laminate, but that is a manufacturer product statement rather than independent testing of a complete outdoor sign assembly. For repeated favor or packaging projects, compare roll labels with individual custom stickers before choosing a format.
Mount signs without creating unwanted damage
Ask the venue what may be attached to walls, doors, glass, fences, and painted surfaces. Even products described as removable can interact differently with fresh paint, delicate wallpaper, aged finishes, or hot glass. When permission or surface condition is uncertain, use freestanding holders, easels, frames, tabletop clips, or weighted sign stands.
Permanent outdoor mounting tape is not a temporary party solution. 3M’s instructions for its permanent outdoor mounting tape warn that removal may damage surfaces and direct users to apply it to clean, dry surfaces. Read the manufacturer’s mounting instructions before choosing any permanent adhesive.
Before guests arrive, check that signs cannot swing around and reverse the apparent arrow direction. Secure hanging signs at two points, keep floor displays clear of accessible routes, and remove any sign that creates a trip or obstruction risk.
Example 10-sign home party pack
A ten-sign starter set covers many home parties without filling every surface. Adjust the quantity after walking the actual route; a small apartment may need only three signs, while a community hall with several entrances may need repeats.
- Welcome or Entrance at the first guest approach
- Check In at the greeting or name-tag station
- Drinks at the beverage area
- Food at the main serving table
- Desserts at a separate sweets table
- Restrooms at the first non-obvious turn
- Photo Booth at the activity area
- Games at the room, yard or table where they begin
- Gifts at the designated gift table
- Exit or Thank You where guests leave
Create left- and right-facing versions of the destinations that may require turns. A straight-ahead version is useful for a long driveway or hallway. Do not print every possible direction automatically; finalize the route first so unused signs do not waste paper and ink.
Coordinate signs with the rest of the party
A matching set does not require every item to be the same size or shape. Use one headline font, one supporting font, two main colors, and one repeated motif. The motif could be a tiny bat for Halloween, a balloon cluster for a birthday, or a floral corner for a shower.
Carry that system into invitations, welcome signs, buffet cards, favor labels, thank-you stickers, and gift tags. Keep practical text dominant: a food label still needs a readable food name, and a directional sign still needs an unmistakable arrow. Decorative coordination should make the event feel intentional without slowing comprehension.
Frequently asked questions
What size should printable party direction signs be?
Use letter size as a flexible starting point for doors and hallway turns, half letter for close-range displays, and quarter letter for tabletop holders. Move to a larger format when guests need to read the sign from farther away. Test one sign in its actual location before producing the set.
Should I print party signs on paper or cardstock?
Paper is sufficient when it will be fully supported by a frame or sleeve. Cardstock is helpful for sign holders and other displays where extra stiffness matters. Confirm that the selected stock is compatible with the printer and feed path.
How do I know which way the arrows should point?
Decide at the venue, not from memory. Stand where the guest will read each sign, face the same direction the guest will face, and mark the required arrow on a placement list. Recheck the route after installation.
What if my printer leaves white margins?
Treat the margin as part of the design, test a supported borderless mode, or print on a larger sheet and trim. Never assume that borderless printing is available for every paper size and cardstock setting.
Can home-printed signs be used outdoors?
They can be used in a suitable temporary protected display, but durability depends on the paper, ink, enclosure, backing, attachment, wind, moisture, and exposure time. A protected setup is safer than making a blanket weatherproof claim.
Make the route clear before making it decorative
Start by walking the guest route and listing every real decision point. Then assign one short destination and one correct arrow to each location. Print a single test sign, confirm its readability and margins, and install the complete set only after checking every direction on site. When the wayfinding works first, the colors and party theme can add personality without getting in the way.
References
- Avery Presta® Template 95282 Cards 8-1/2" x 11" | Avery
- How to Print Invitations at Home: Paper, Printer Limits, and When to Outsource – PrintInvitations
- Upload Your Own Wedding Invitations: File Setup Guide for Canva, Etsy and Designer Files – PrintInvitations
- Custom Stickers | Fast & Free Shipping – CustomStickers.com
- Scotchbrand.com/Mounting